Today we will discuss about creating List programmatically in SharePoint 2010 using Visual studio 2010.
If we are using only one instance of list we will follow this approach for creating list.
open the visual studio 2010.
File-->New-->Project
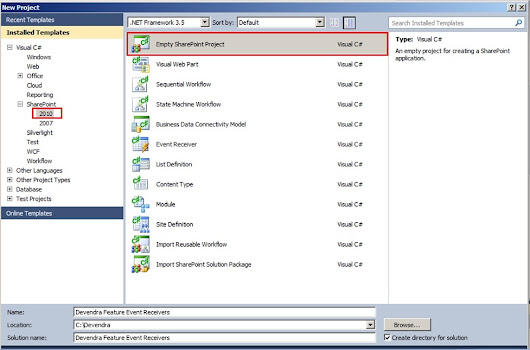
Select C#-->SharePoint-->2010
Select Empty SharePoint Project
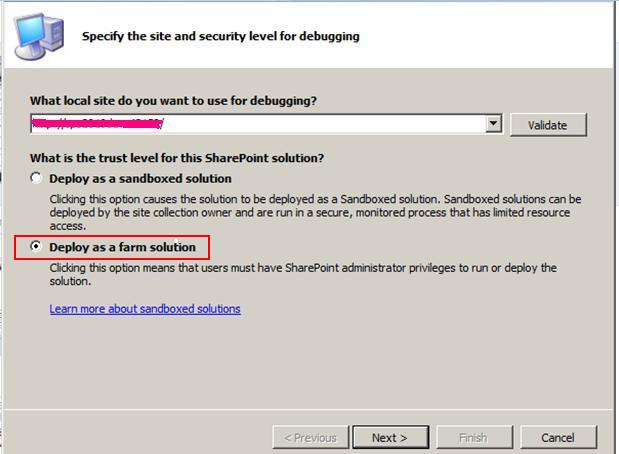
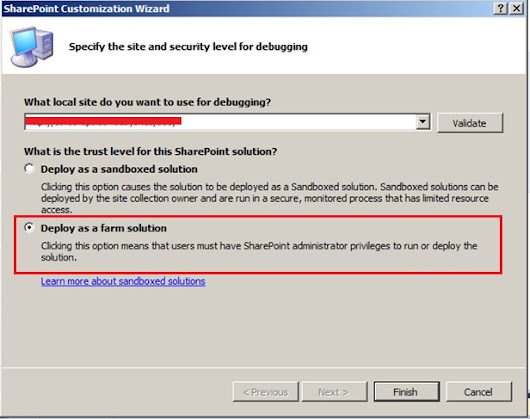
Deploy as a Form solution.
Click on Finish
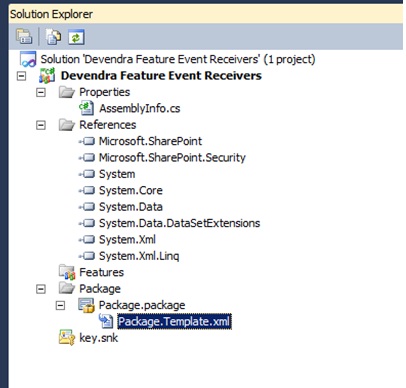
Project Solution structure is below for Empty SharePoint Project.
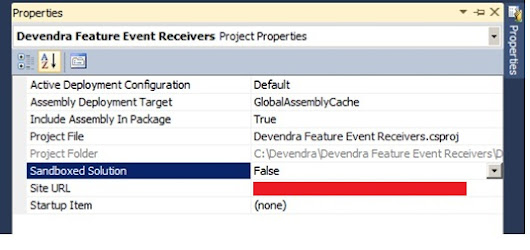
Select the project and click on F4 for the properties.
Check for the Sandbox Solution property it is set to false now as we select the Trust level for SharePoint solution as From Solution.
From here if you change that to Sandbox solution by setting property
Sandbox Solution=”True”
You can edit the site URL which you want to deploy using site URL property.
Right Click on Feature node and click on AddFeature.
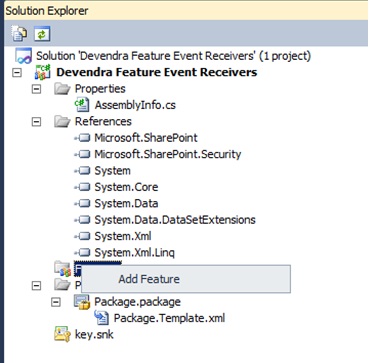
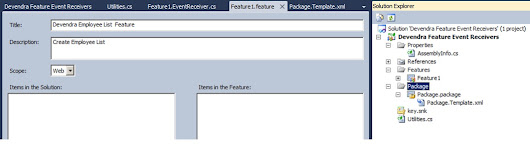
It will add Feature1 to the Features node in the project.
Change the Title according to your requirement .Here it is Devendra Employee List feature.
I want this List available at site collection level to achieve this we need to change the
Scope From Web to Site.

Now I am using Scope as web level only.
We will create a list using object model because we are going to use only one instance of this list so there is no point of creating list definition.
To do that I will add a feature receiver.
Add Event Receiver to the Feature1 node in the project.
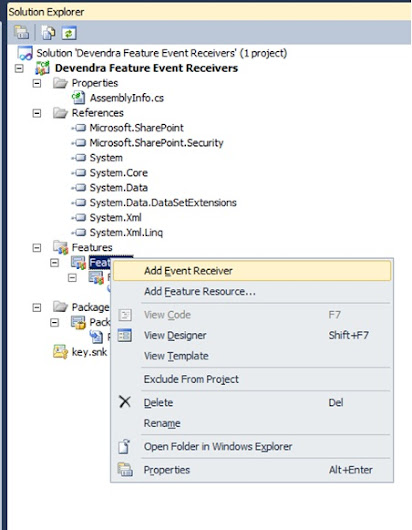
Go ahead and add . Then uncomment the FeatureActivated event .
We will write a code here which will add the Employee List whenever we activated this feature.
add one more class called utilities.cs of type static.
Add Item to the list data to the Employee List.
Once we deactivate this feature the list will get deleted.
Add one more class call utilities.
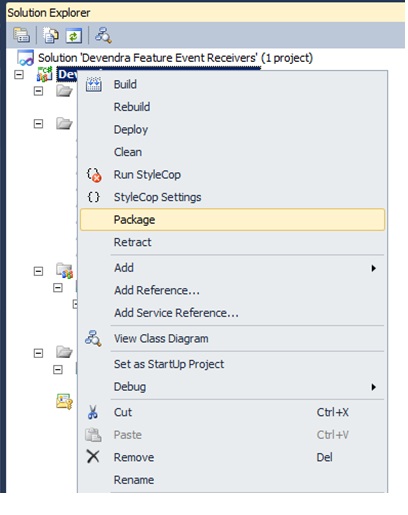
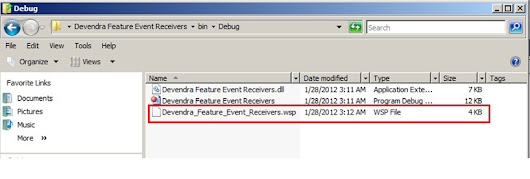
Once you click on the package .go to Bin folder of the project get the WSP file.
Add the solution using stsadm command.
Click on run: type CMD
Execute below command
Stsadm –o addsolution –filename c:\Devendra_Feature_Event_Receiver.wsp.
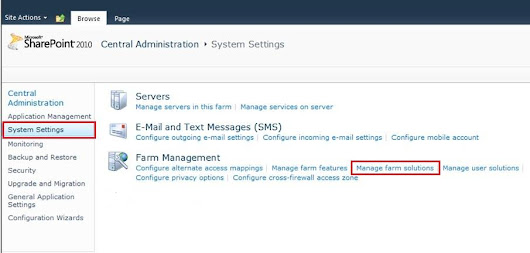
Open Central Admin to deploy the solution.
Got o system settings -> Manage Form solutions
Deploy the solution.
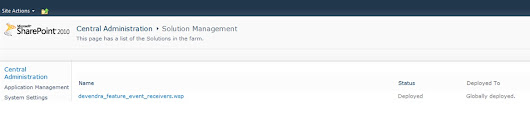
You can see the below screen solution deployed globally.
Open the site URL which we deployed the solution.
Click on SiteActions-->Site settings
Under Site Actions click on Manage Site Features.
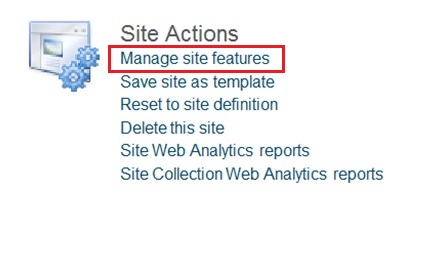
Activate the feature Devendra Employee List Feature.

After activation we can see the Employee list and data inserted into the list.

Once you deactivate the feature list will get deleted.
SharePoint-Journey for Administrators, Developers and users
If we are using only one instance of list we will follow this approach for creating list.
open the visual studio 2010.
File-->New-->Project
Select C#-->SharePoint-->2010
Select Empty SharePoint Project

Deploy as a Form solution.
Click on Finish

Project Solution structure is below for Empty SharePoint Project.

Select the project and click on F4 for the properties.
Check for the Sandbox Solution property it is set to false now as we select the Trust level for SharePoint solution as From Solution.
From here if you change that to Sandbox solution by setting property
Sandbox Solution=”True”
You can edit the site URL which you want to deploy using site URL property.

Right Click on Feature node and click on AddFeature.

It will add Feature1 to the Features node in the project.
Change the Title according to your requirement .Here it is Devendra Employee List feature.
I want this List available at site collection level to achieve this we need to change the
Scope From Web to Site.

Now I am using Scope as web level only.

We will create a list using object model because we are going to use only one instance of this list so there is no point of creating list definition.
To do that I will add a feature receiver.
Add Event Receiver to the Feature1 node in the project.

Go ahead and add . Then uncomment the FeatureActivated event .
We will write a code here which will add the Employee List whenever we activated this feature.
using System;
using System.Runtime.InteropServices;
using System.Security.Permissions;
using Microsoft.SharePoint;
using Microsoft.SharePoint.Security;

namespace Devendra_Feature_Event_Receivers.Features.AddList
{
 ///
 /// This class handles events raised during feature activation, deactivation, installation, uninstallation, and upgrade.
 ///
 ///
 /// The GUID attached to this class may be used during packaging and should not be modified.
 ///

 [Guid("5bf5f6c5-c371-419a-984b-f0ecf9ddeda0")]
 public class Feature1EventReceiver : SPFeatureReceiver
 {
     // Uncomment the method below to handle the event raised after a feature has been activated.
     public override void FeatureActivated(SPFeatureReceiverProperties properties)
     {
         try
         {
             //get the current web object.
             SPWeb web = properties.Feature.Parent as SPWeb;


             SPList list = web.EnsureList("Employee", "This list contains Employee details.", SPListTemplateType.GenericList);


             if (list != null)
             {

                 SPField field = list.EnsureField("Title", "", SPFieldType.Text, true);
                 field.Title = "FirstName";
                 field.Update();


                 SPField fld = null;

                 fld = list.EnsureField("LastName", "Employee LastName", SPFieldType.Text, true);


                 if (fld != null)
                 {
                     SPView view = list.Views[0];
                     view.ViewFields.Add(fld);
                     view.Update();
                     fld = null;
                 }

                 SPListItemCollection listItems = list.Items;
                 AddItems(listItems, "Devendra", "Velegandla");
             }
             else
             {

             }
         }
         catch (Exception ex)
         {
             throw ex;
         }
     }
     public static void AddItems(SPListItemCollection listItems, string FirstName, string LastName)
     {
         SPListItem item = null;
         item = listItems.Add();
         item["FirstName"] = FirstName;
         item["LastName"] = LastName;
         item.Update();
     }

     public override void FeatureDeactivating(SPFeatureReceiverProperties properties)
     {

         SPWeb web = properties.Feature.Parent as SPWeb;

         web.DeleteList("Employee");
     }


 }

}
add one more class called utilities.cs of type static.
using System;
using System.Collections.Generic;
using System.Linq;
using System.Text;
using Microsoft.SharePoint;
namespace Devendra_Feature_Event_Receivers.Features.AddList
{
 public static class Utilities
 {

     public static SPList EnsureList(this SPWeb web, string listTitle, string desc, SPListTemplateType lstTemplateType)
     {

         SPListCollection lstCollection = web.Lists;


         SPList lstObj = (from SPList lst in lstCollection
                          where string.Equals(lst.Title, listTitle, StringComparison.InvariantCultureIgnoreCase) == true
                          select lst).FirstOrDefault();


         if (lstObj != null)
         {
             return lstObj;
         }

         Guid lstGuid = web.Lists.Add(listTitle, desc, lstTemplateType);
         try
         {
             SPList newList = web.Lists.GetList(lstGuid, true);
             newList.OnQuickLaunch = true;
             newList.Update();
             return newList;
         }
         catch
         {
             return null;
         }
     }

     public static SPField EnsureField(this SPList list, string fldDisplayName, string fldDesc, SPFieldType fldType, bool isMadatory)
     {

         SPFieldCollection fieldCollection = list.Fields;


         SPField spField = (from SPField field in fieldCollection
                            where string.Equals(field.Title, fldDisplayName, StringComparison.InvariantCultureIgnoreCase) == true
                            select field).FirstOrDefault();


         if (spField != null)
         {
             return spField;
         }

         try
         {
             list.Fields.Add(fldDisplayName, fldType, isMadatory);
             SPField spfield = list.Fields.GetField(fldDisplayName);
             spfield.Description = fldDesc;
             spfield.Update();
             return spfield;
         }
         catch
         {
             return null;
         }
     }

     public static bool DeleteList(this SPWeb web, string listTitle)
     {

         SPListCollection lstCollection = web.Lists;


         SPList lstObj = (from SPList lst in lstCollection
                          where
                              string.Equals(lst.Title, listTitle, StringComparison.InvariantCultureIgnoreCase) == true
                          select lst).FirstOrDefault();


         if (lstObj != null)
         {
             try
             {
                 lstObj.Delete();
                 return true;
             }
             catch (Exception ex)
             {
             }
         }
         return false;
     }
 }
}
Add Item to the list data to the Employee List.
Once we deactivate this feature the list will get deleted.
Add one more class call utilities.

Once you click on the package .go to Bin folder of the project get the WSP file.

Add the solution using stsadm command.
Click on run: type CMD
Execute below command
Stsadm –o addsolution –filename c:\Devendra_Feature_Event_Receiver.wsp.
Open Central Admin to deploy the solution.
Got o system settings -> Manage Form solutions

Deploy the solution.
You can see the below screen solution deployed globally.

Open the site URL which we deployed the solution.
Click on SiteActions-->Site settings
Under Site Actions click on Manage Site Features.

Activate the feature Devendra Employee List Feature.

After activation we can see the Employee list and data inserted into the list.

Once you deactivate the feature list will get deleted.
SharePoint-Journey for Administrators, Developers and users